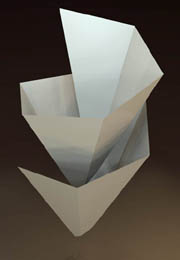
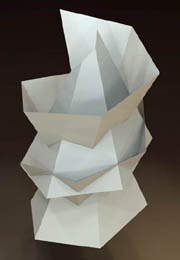
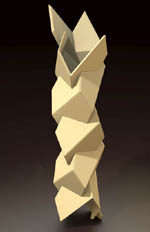
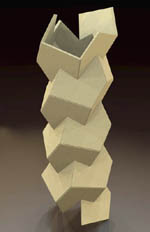
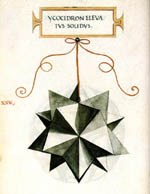
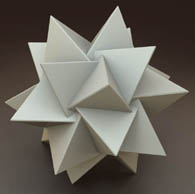
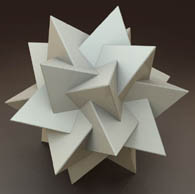
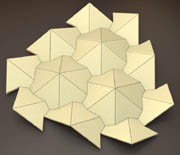
3.1. Twisting. Until now the tiles we have used can also be applied for flat tilings, or tiles that we knew as faces of the regular solids, the semi-regular solids and their duals. So we can ask ourselves whether it is possible to find other shapes of tiles that only can be used for non flat tilings. To study this we first go back to one of Leonardo da Vinci’s drawings of an elevation of a polyhedron, the elevated icosahedron of Figure 23. The step we will now use in making a change in the shape of the tiles is called “twisting”. The elevated icosahedron can be seen as a set of twenty triangular pyramids. When we rotate each pyramid on it’s own axis with the same angle we will get a new object, like the ones in Figure 24 and 25. We will call this process twisting. In every stage the object we get is built out of (twenty times three) sixty faces, or tiles. The shape of the tile has changed from an equilateral triangle into a non-convex pentagon. And in every stage the shape of the tiles is the same. The object in Figure 25 can be recognized as a compound of five tetrahedra, but here it just is a set of sixty equal tiles that makes a non-flat tiling.


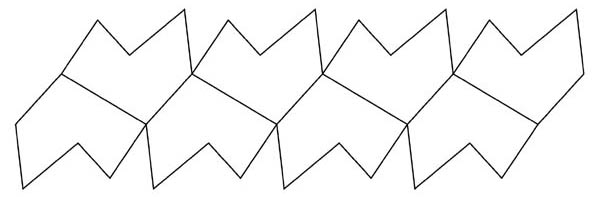
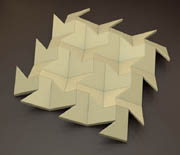
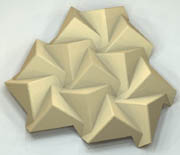
Two more examples can be seen in Figure 27 and 28. The non-flat tiling of Figure 27 is derived from the elevation of the flat tiling of equilateral triangle.

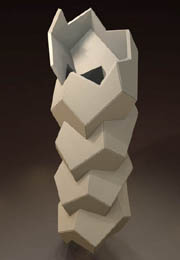
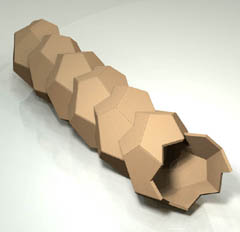
4.1. New shapes for cylindrical tilings. To create new shapes of tiles for cylindrical tilings, the method used to generate new tiles described in Section 3 didn’t turn out to be very successful. Therefore a new approach was developed. First a normal spiral curve is drawn. This curve is divided in equal parts. After that a straight line is drawn from the start point of the first part to the start point of the next part, and so on. These straight lines are then extruded downwards to the axis of the spiral, as in Figure 29. This is the basic shape that is needed to construct the shape of the tiles for the cylindrical tiling. The shape of Figure 29 is now turned upside down and added to the original shape (Figure 30). The shapes intersect each other, and from the intersection lines we can derive the final shape of the tile. The completed tiling is shown in Figure 31. The shape of the tile is a non-convex hexagon and cannot be used to tile a flat plane. New tilings are created this way.